
Alright, ladies, listen up! We’re about to dive headfirst into the ultimate guide to conquering Everest Base Camp. Yeah, you heard that right – we’re talking about scaling the majestic heights of the Roof of the World. Now, I know what you’re thinking – isn’t that too extreme?
Well, strap on your hiking boots and get ready to have your mind blown because this epic trek is like nothing you’ve ever experienced before. From breathtaking views to unparalleled challenges, the allure of Everest Base Camp is undeniable. And guess what? You’re about to embark on this incredible journey armed with all the knowledge and tips you need to make it a legendary success.
So, hold on tight and get ready to conquer that summit because this guide will empower you to reach new heights and make memories that’ll last a lifetime. Let’s do this, ladies!
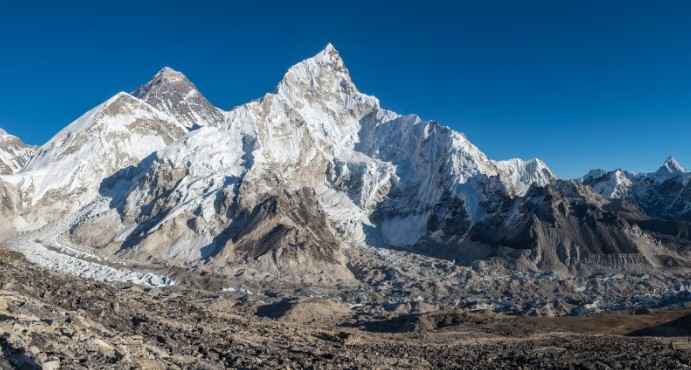
Alright, my adventure-hungry amigas, let’s get the rundown on this Everest Base Camp hike. First off, we’re talking about the Himalayas – the mother of all mountain ranges. Located in Nepal, this hike takes you through some of the most stunning scenery our planet has to offer. And we’re not just talking about panoramic views of lush forests, traditional Sherpa villages, and Himalayan peaks that will take your breath away. Oh no, this one will also take you to the heights of over 17,000 feet at Everest Base Camp.
Yeah, you heard that right – we’re talking about hiking to the base of the tallest mountain in the world. But don’t let that intimidate you, my fearless friends. While reaching the summit of Everest is reserved for the most elite mountaineers, making it to Base Camp is a feat in itself. Sure, it’s a challenging hike, but one that’s totally doable with the right preparation and attitude.
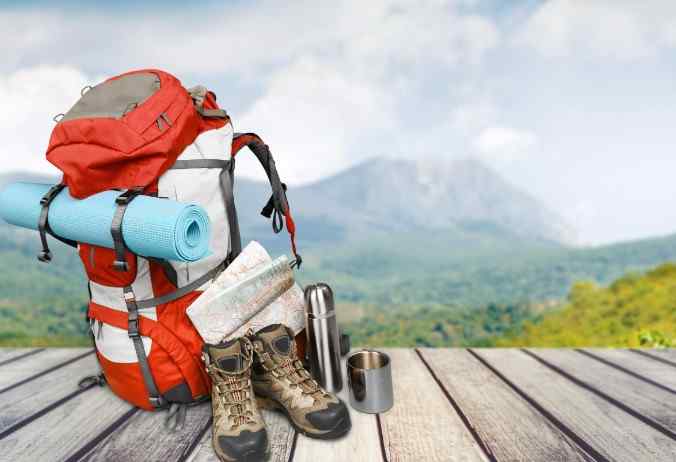
First things first, let’s talk about training. You don’t just wake up one day and decide to tackle Everest, unless you’re some kind of superhuman, in which case, please share your secret with the rest of us. No, my friend, we need to whip ourselves into shape before we even think about stepping foot on that mountain. Hit the gym, go for long hikes, and build up your stamina like you’re training for the Olympics. Trust me, those steep ascents will thank you later.
Now that you’re equipped with these tips, get out there and show the world what badass girls can do!
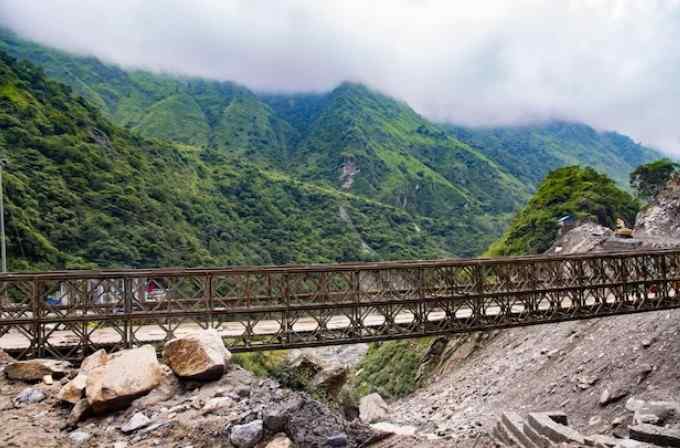
So, the most popular route to Everest Base Camp starts in Lukla, a tiny town with an airport (yes, they have an airport in the middle of the mountains, because why not?). This gem of a town is nestled in the Solukhumbu region of Nepal. From Lukla, you’ll be following the Dudh Koshi River valley, and let me tell you, it’s a sight to behold. Picture yourself walking amidst the beauty of mother nature, passing through charming Sherpa villages that could easily be mistaken for postcard-worthy scenes. And guess what? This is just the warm-up before you finally reach the holy grail of trekking: Everest Base Camp.
Lukla to Phakding (2,651m) – Day 1-2: Strap yourself in for a scenic flight from Kathmandu to Lukla, then trek your way to Phakding. Remember, it’s not just about the destination; it’s about the journey, the sore legs, and the breathtaking views that make it all worth it.
Namche Bazaar (3,440m) – Day 3-4: Trek your way to the buzzing Sherpa capital of Namche Bazaar. Take your time to explore the town and acclimate to the altitude. Spoiler alert: you’ll become the queen of acclimatization.
Tengboche (3,860m) – Day 5: Pay a visit to the famous Tengboche Monastery and soak in the awe-inspiring views of Everest and its majestic peaks. It’s like a spiritual quest with a side of cardio.
Dingboche (4,360m) – Day 6-7: Get ready for a journey through charming rhododendron forests and picturesque villages as you ascend to Dingboche. Oh, and don’t forget to take a day to fully embrace your acclimatization and conquer Nagarjun Hill for those epic panoramic views. You’ll be feeling on top of the world.
Lobuche (4,940m) and Gorak Shep (5,160m) – Day 8-9: Trek your way to Lobuche and then embark on a daring expedition to Gorak Shep. From there, it’s time for the ultimate highlight: the epic journey to Everest Base Camp (5,364m). Step by step, and once you reach there, take a bow, queen of the mountains.
Kala Patthar (5,550m) and Pheriche (4,240m) – Day 10: Rise and shine, it’s time to conquer Kala Patthar and witness the sunrise over Mount Everest. Grab your camera and be ready to capture those Instagram-worthy shots. Then descend to Pheriche for a well-deserved rest. You’ll be dreaming of that sunrise view for years to come.
Namche Bazaar and Lukla – Day 11-12: It’s time to retrace your steps, descend through familiar villages, and make your way back to the familiar streets of Namche Bazaar and Lukla. Reflect on your epic adventure and bask in the glory of your achievements.
Most Agencies will have 14-16 Days total listed for the trek. Keep this in mind when you need to take time off of work for this feat.
Alright, my fearless adventurers, let’s talk about the all-important task of booking your Everest Base Camp trek. Brace yourselves, because there are several options to choose from, and each comes with its own set of pros and cons. It’s time to decide how you want to conquer those mighty mountains on your terms.
Pros
Expertise: Trekking agencies have got the Himalayan trekking game down. They’ve got the knowledge and experience to guide you through this adventure without breaking a sweat. Trust them to provide valuable guidance and support along the way.
Convenience: Don’t feel like dealing with the nitty-gritty logistics? No worries! Trekking agencies have got you covered. They’ll handle the permits, accommodations, meals, and transportation, leaving you with zero hassle and more time to focus on doing your hair in a fierce mountain bun.
Safety: Safety first, my trailblazing queens! Trekking agencies prioritize your well-being and are equipped to handle any emergencies that may arise. They’ll provide experienced guides who know their way around those mountains like the back of their hand. And if you need an extra boost, they might even throw in a porter or two. Who says being a fierce independent traveler means you can’t get a little help when you need it?
Group or Solo: Ready to conquer those mountains with some like-minded badassery? Trekking agencies offer options for both group and solo treks, allowing you to choose according to your preferences. Whether you’re all about that solo empowerment or want to form a kickass trekking crew, the choice is yours.
Cons
Cost: Ah, yes, the price of convenience. Booking through an agency can bite a little harder in the wallet, thanks to those dreaded service fees. But hey, look at it this way: sometimes you’ve gotta pay to play, and in this case, the price might just be worth all the convenience and support you get in return.
Limited Flexibility: We get it, you like to do things your way. Group treks organized by agencies often come with fixed itineraries and schedules, which can cramp your style a bit. Customizing the trek to your heart’s desire might take a bit more effort when you’re booking through an agency. But hey, who said blazing your own trail was supposed to be easy?
Pros
Cost Savings: Think you’ve got the budgeting chops to save some serious cash? The good news, independent trekkers can book accommodations and meals directly at teahouses and manage permits themselves, which can be a real money-saver.
Flexibility: Sometimes, you need the power of choice, right? Going solo means making decisions on the fly and having complete control over your itinerary. Want to stop for that perfect Instagram shot? Go for it!
Cons
Logistics: Let’s be honest; managing permits, accommodations, and transportation can be complex and time-consuming, especially if you’re a first-time trekker. But hey, there’s nothing like a bit of a challenge, right?
Safety: Safety first, my trailblazing queens! Independent trekkers may not have access to emergency assistance or experienced guides or porters, which can be a safety concern in the remote areas of your journey.
On average, a guided trek through an agency can cost anywhere from $1,000 to $5,000 or more, depending on the duration, level of service, and time of year. But are you willing to pay for that extra support and convenience?
So you fierce, independent ladies can complete the trek for approximately $1,000 to $1,500, including permits, accommodations, meals, and transportation. Remember, though, that your costs can vary based on your spending habits.
If you’re feeling like you need a little help on the Everest Base Camp trek, research and select a reputable agency with a proven track record. Here are some options to consider:
Himalayan Glacier ($2570-$3200 for Trek)
Known for experienced guides and well-organized treks.
Adventure Consultants (approx. $5000 for Trek)
Offers guided treks and mountaineering expeditions with a focus on safety. You may have remembered them from the 2015 movie “Everest”.
World Expeditions ($2800 For Trek)
Known for its sustainable and responsible trekking practices.
Discovery World Trekking ($1530)
Discovery World Trekking is known for its team of experienced and knowledgeable guides who are familiar with the Everest region.
Remember that all prices only include the trek and do not include airfare to Nepal itself. It is best to check out the sites to see what is included and excluded from the fare.
If you’re ready to take on the trek solo, make sure to do your research, have a detailed itinerary, and ensure you have all the necessary permits and equipment. And, if you’re feeling like you could use a little safety and support, don’t be afraid to hire a local guide or porter. Ultimately, the choice between booking through an agency or organizing it yourself depends on your budget, level of experience, and personal preferences.
Listen up, my fearless adventurers! As you gear up for your epic Everest Base Camp adventure, I want you to remember that this journey is not just a physical slog up a mountain. No, no, my trailblazing ladies, it’s so much more than that!
Every step you take on this trek is a passport to an experience that will be etched in your memory for a lifetime. You’ll be surrounded by majestic peaks that make you feel like a tiny speck in the grand scheme of the universe. And when you’re done conquering those mountains, you can cozy up in teahouses, sipping hot beverages and swapping stories with fellow trekkers who understand the magic of what you’re doing.
Now, my brave souls, here’s the best part: you get to choose how you want to embark on this incredible journey. Whether you decide to embrace the guidance and convenience of the guided path or venture out solo like the fiercely independent woman you are, this is your chance to take control and write your own freaking adventure story amidst the Himalayan wonderland! And, no matter where you go, always remember to Travel Till You Drop!
Use Skyscanner to find a cheap flight. This is my very first stop when I’m looking for my next trip. It’s a fast, easy-to-use search engine that is perfect for finding an affordable flight, a perfect hotel, and the right rental car for you in locations around the globe.
If you are looking for a super budget friendly location and are open to a hostel stay, make sure you book your hostel with Hostelworld. It offers the broadest range of quality hostels around the world.
If you’d prefer a hotel or a guesthouse for stays less than 28 days, drop on over to Booking.com It’s perfect for providing excellent options, a ton of user reviews, and prices to fit every budget.
For stays over 28 days, AirBnB still remains my #1 choice. User reviews and monthly pricing allow for some incredible deals all around the world.
Travel insurance is but a small up-front investment that you won’t want to leave home without. After just one experience of having to delay or cancel your trip or having your luggage stolen, you’ll wish you would have made that investment. I’ve hated my life a few times when the moment arose, and I decided to skip out. Let’s just say, I’ve changed my ways and recommend each of the following companies to protect your ass-ets.
Travel credit cards allow you to earn points that can be redeemed for free flights and accommodation — all without any extra spending. Check out my guide to getting free flights to get started.
Check out my Resource Page for the best companies to help you book your travel at reduced rates! This list will help you get to where you’re going. I know-I use them ALL the time!


Hi, Jill Here
Hi! I’m Jill, a Dallas, Texas girl traveling the world. After a career in the Air Force and touring over 50 countries later, my need to explore keeps going! It’s time to rock & roll and find all those places I never knew I was missing.
Table of Contents
Join me to get exclusive travel tips, giveaways and more!
Gallery
Copyright © 2023 | All Right Reserved